Scenario: You connect your Windows or Hyper-V system to a FiberChannel or iSCSI target device that supports multi-path I/O (MPIO). When you view Disk Management, it shows up twice (or more). You can bring one online, but any others show “Offline (The disk is offline because it has a redundant path with another device)”.
The basic issue is that multipath I/O needs to be configured at the Windows level. If you have specialized software from your hardware vendor, use that first. They will often enable and configure the necessary Windows components for you.
[citationic]
Note: I published the original version of this article and script on a different blog back in 2011. I have updated it for current versions of Windows Server, added more information (including PowerShell instructions), and brought it to Project Runspace. Continue reading to configure your system if a fiber channel or iSCSI disk appears two or more times in Disk Management.
Step 1: Enable MPIO
To use multiple iSCSI paths at all, you must enable the MPIO (multipath I/O) feature in Windows Server. You can accomplish this in PowerShell, Server Manager, or using DISM at the command line.
Method 1: Enable MPIO in PowerShell
These instructions show all parameter names. The Windows Feature cmdlets all set the -Name parameter as the first positional parameter.
First, check the status of the feature with Get-WindowsFeature:
Get-WindowsFeature -Name Multipath-IO
The Get-WindowsFeature cmdlet also allows wildcards, ex:
Get-WindowsFeature -Name *multi*
The output will show an X in brackets before the display name and Installed in the Install State column for currently installed features. If you find that your server already has this feature, skip to Step 2. If you do not see an X and the status shows Available, use Install-WindowsFeature (which has an alias of Add-WindowsFeature):
Install-WindowsFeature -Name Multipath-IO

The Restart Needed column will indicate if you need to reboot the server. You can restart with Restart-Computer.
Restart-Computer
These steps enable the feature but might not immediately correct the problem. Jump down to step 2 for the configuration process.
Method 2: Enable MPIO in Server Manager
These steps work on Windows Server with the Desktop Experience enabled. It can run remotely from a Windows desktop or another instance of Windows Server for systems without the Desktop Experience.
Server Manager starts automatically when you log on to Windows Server. If you disabled that, you can find it under the Start menu. Follow these steps to enable MPIO.
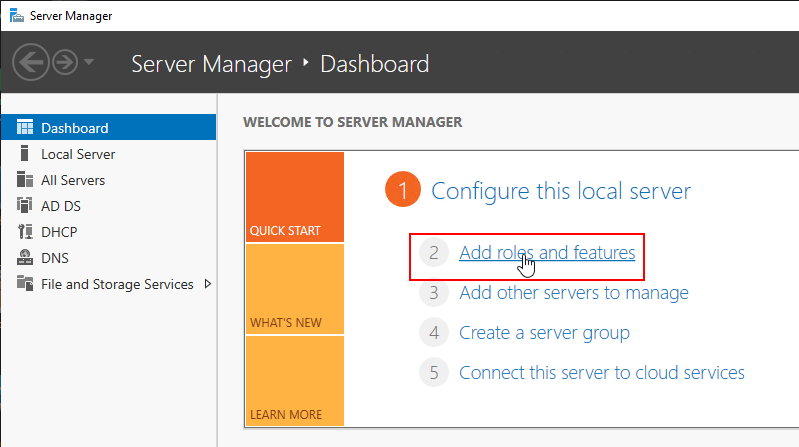
- On the dashboard screen, click Add roles and features.
- If you see an informational screen, click Next.
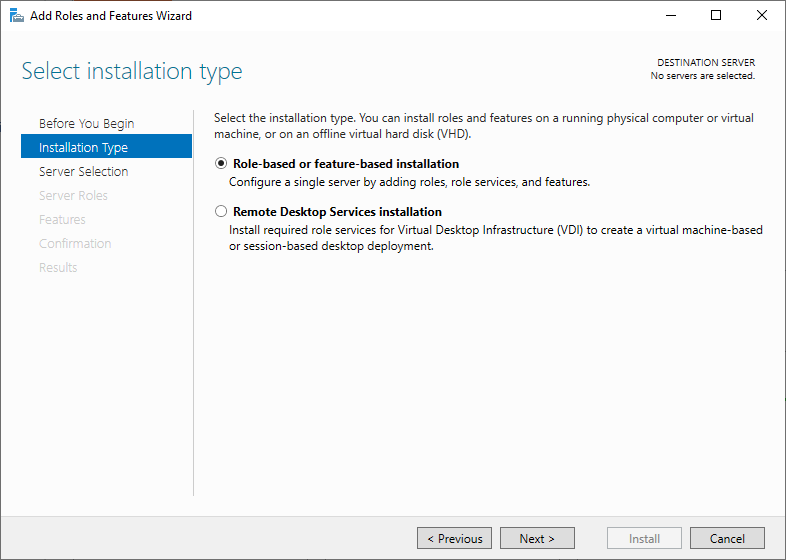
- Keep the option selected for Role-based or feature-based installation and click Next.
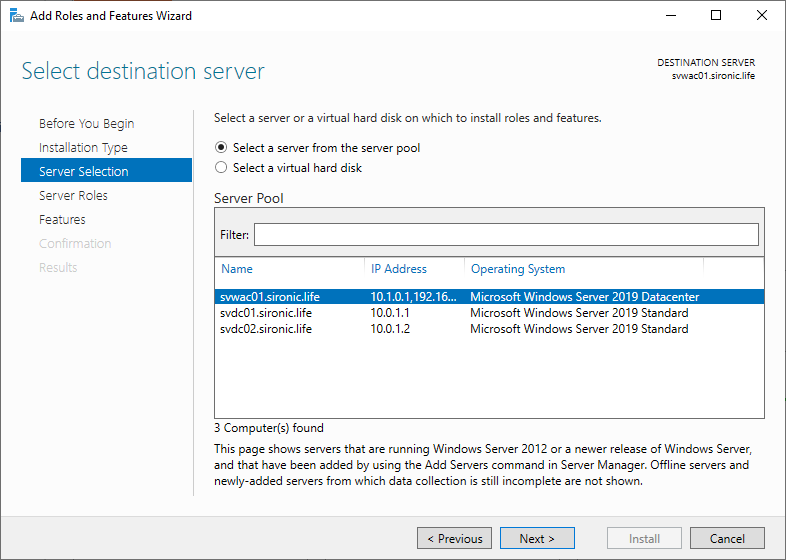
- Highlight the server that you want to have the multipath I/O feature. If it does not appear, cancel the wizard and add it from the dashboard, then restart these steps. Once you have highlighted the appropriate system, click Next.
- Click Next on the Select server roles page without changing anything.
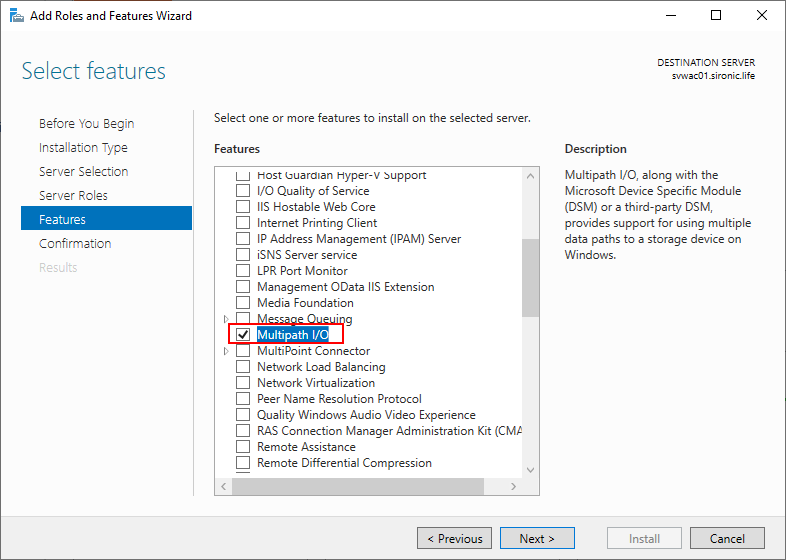
- On the Select features page, scroll down to Multipath I/O and click its checkbox. Click Next.
- On the confirmation page, optionally select the item to Restart the destination server automatically if required. This will save you the step of needing to perform any necessary reboot manually, if you do not need to schedule the downtime. When ready, click Install.
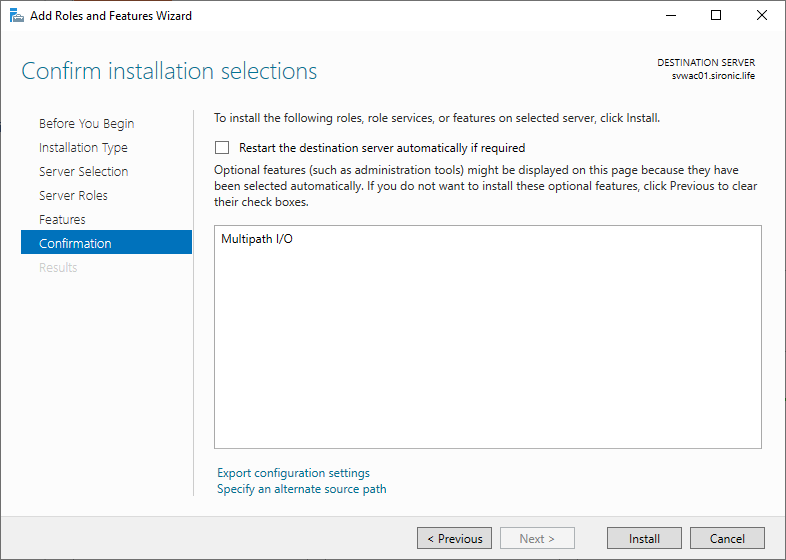
The installation will begin and take a few minutes. You can close the wizard and allow Server Manager to complete in the background, or wait on the dialog.
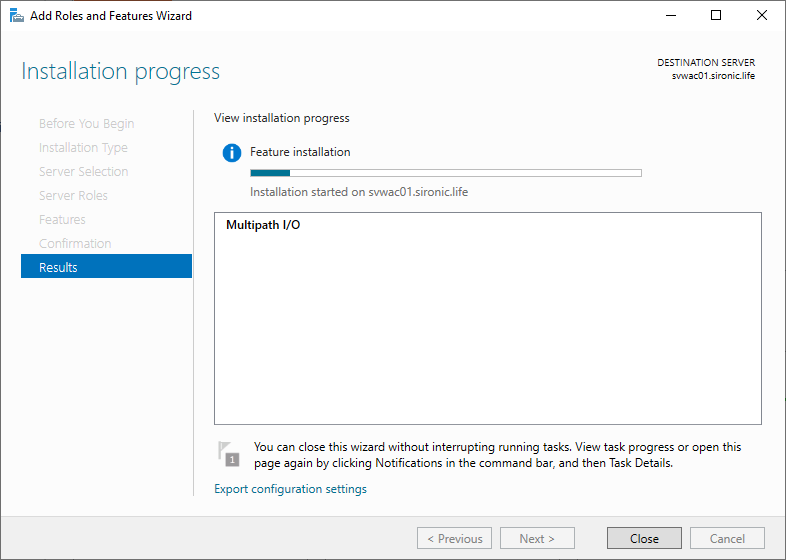
If you did not select the option to automatically reboot and the installation requires one, restart the server before continuing. Jump down to Step 2 for multipath configuration.
Method 3: Enable MPIO at the Command Line
You can use the traditional DISM.EXE application to enable MPIO:
dism.exe /Online /Enable-Feature /FeatureName:MultipathIo
Remember that DISM treats feature names as case sensitive, so you must type “MultipathIo” exactly as it appears. It does not care about the case of switches, though.
If DISM requires a reboot to enable MPIO, it will tell you. Perform any necessary reboots before proceeding to step 2.
Step 2: Enable Specific Devices for MPIO
After installing MPIO in step 1, you need to configure it for your devices.
Ordinarily I show PowerShell options first as that typically requires less overall effort. However, MPIO has a large number of touchpoints. PowerShell is still faster if you know exactly what you need to do. With the possibilities, I can’t reasonably show you what you’ll need for your situation. Instead, I will start with the GUI so that you can orient yourself to the task. For those of you that need to do this in bulk or want the PowerShell/command-line versions, I’ll have some examples after the GUI demonstration.
Method 1: Enable Device MPIO in the GUI
This method works on all installations of Windows Server, including core mode. Note that this UI behaves differently from the typical Windows paradigm. The action buttons on each dialog page immediately carry out their operations. The OK and Cancel buttons both close the dialog without doing anything else. Do not use this dialog to tinker with production systems.
At an elevated command or run prompt, type:
mpiocpl.exe
That will open to the MPIO Devices tab. We will return to that tab later. For now, switch to the Discover Multi-Paths tab. You will see something like the following:
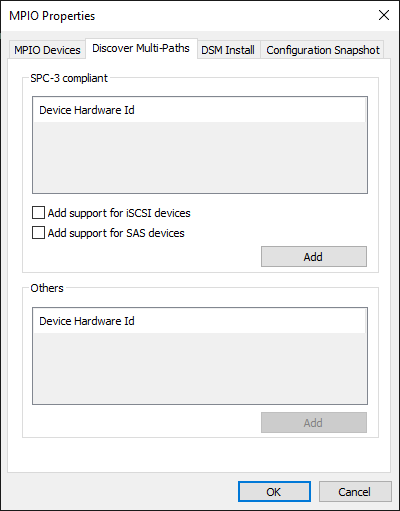
The two list boxes display all MPIO-capable devices that your server recognizes but has not configured in MPIO. It will typically not list iSCSI devices. If you have iSCSI, check the corresponding Add support for iSCSI devices. Do the same for SAS devices, if you wish. Once you have selected and checked all items that you want to enable for MPIO, click the corresponding Add button. From this point forward, the server will have enabled MPIO for all selected items, and you will no longer be able to select them:
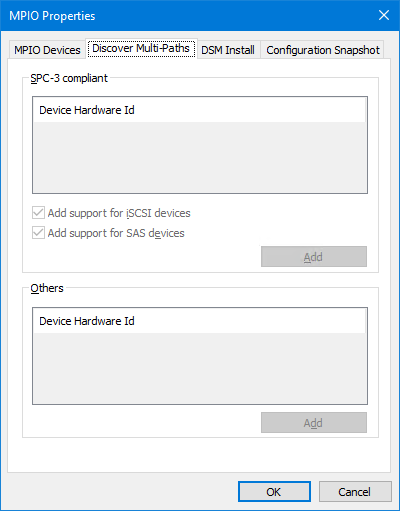
The system may again prompt for a reboot. You can save that for after you have explored this dialog, but remember to satisfy any pending reboots to fully enable MPIO support.
Switch back to the initial MPIO Devices tab. Here you will find all devices that currently have MPIO enabled. Once you have enabled support for a device or device type, it will appear here.
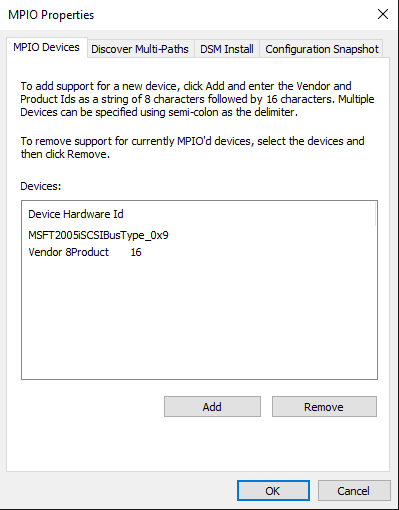
In the above screenshot, an entry appears for MSFT2005iSCSIBusType_0x9. Unless someone later removes this item, then any and all devices this systems connects to over iSCSI that can interoperate with the Microsoft iSCSI DSM (device-specific module) will automatically have MPIO support. If you selected to enable support for SAS devices, a similar item will appear for that. The Vendor 8Product 16 item is just a sample dummy device which you can remove or ignore (the 8 is because the vendor segment uses 8 characters and the 16 is because the product segment uses 16 characters). If you have vendor-provided MPIO DSMs and they shipped in an installer, it may have populated here.
The remaining two tabs, DSM Install and Configuration Snapshot, hold no special secrets. The configuration snapshot does not do much useful; you can’t import it later or anything like that. It creates a neatly formatted text file that shows the settings and path information for MPIO disks.
Method 2: Enable Device MPIO with MPCLAIM.EXE
All examples shown here must run in an elevated command prompt.
The document (in mpclaim /help) is both thorough and confusing at the same time. It tells you what it wants, although somewhat non-intuitively:
(Un)Claim usage: mpclaim reboot_opt claim_switch device_switch device_hwid(s)
This means that when making claim/unclaim changes, you always need to supply three switches. For the first switch, you must tell mpclaim whether or you do or do not want auto-reboot with -r or -n, respectively. For the second switch, you must tell mpclaim if you want to claim or unclaim with -i or -u, respectively. For the third switch, you must tell mpclaim what you want to claim with -d for specific hardware IDs that you specify or -a or -c for any devices that match the mask that you enter.
If you want to enable MPIO for all iSCSI devices covered by the Microsoft DSM:
mpclaim -n -i -d "MSFT2005iSCSIBusType_0x9"
That command line has the same effect as clicking the Add support for iSCSI devices checkbox in MPIOCPL and clicking Add.
If you want to enable MPIO for all SAS devices covered by the Microsoft DSM:
mpclaim -n -i -d "MSFT2011SASBusType_0xA "
The trailing spaces in the quotes are optional. That command line has the same effect as clicking the Add support for SAS devices checkbox in MPIOCPL and clicking Add.
To remove support, just run the same command, swapping out -u for -i. When you remove support, the paths and claim typically remain until you reboot.
Alternatively, you can view recognized but unclaimed devices with:
mpclaim -e
On a system that has an unclaimed iSCSI connection, that shows the following:

You can claim the device shown in the table by copying it exactly as you see it, quotes and all, as so:
mpclaim -n -i -a "MSFT Virtual HD "
On this system, the above command will have the same effect as the first command in this section. The difference is that if an iSCSI device is later attached that cannot use this identifier, it will not automatically have MPIO configuration.
You can add MPIO support to all recognized devices with an empty mask:
mpclaim -n -i -a ""
You can view claimed devices with:
mpclaim -h
The above shows the same view as the MPIO Devices tab in mpiocpl.exe.
If you want to export the configuration (like mpiocpl’s Configuration Snapshot):
mpclaim -v
or
mpclaim -v "C:\temp\mpioconfig.txt"
You can open the generated log with notepad, even on a core installation, with something like notepad c:\temp\mpioconfig.txt.
Testing showed that claiming operations took effect immediately while unclaim operations required a reboot even when one was not indicated.
Method 3: Enable Device MPIO with PowerShell
Microsoft provides a complete PowerShell module to control MPIO. These must run in an elevated PowerShell prompt.
To enable MPIO for all iSCSI devices covered by the Microsoft DSM:
Enable-MSDSMAutomaticClaim -BusType iSCSI
To enable MPIO for all SAS devices covered by the Microsoft DSM:
Enable-MSDSMAutomaticClaim -BusType SAS
To show hardware that currently has MPIO enabled:
Get-MSDSMSupportedHW
To list recognized devices that do not currently have MPIO enabled:
Get-MPIOAvailableHW
On a system with a connected but not yet support-enabled iSCSI disk, the above shows:

To directly add support for detected devices, just pipe Get-MPIOAvailableHW to New-MSDSMSupportedHW.
Get-MPIOAvailableHW | New-MSDSMSupportedHW
Alternatively, you can enter the components for New-MSDMSupportedHW directly (unlike mpclaim, you should avoid any trailing spaces):
New-MSDSMSupportedHW -VendorId 'MSFT' -ProductId 'Virtual HD'
According to the documentation, you need to run Update-MPIOClaimedHW after claim and unclaim operations. Testing did not clearly reveal what this does; claims appeared immediately in the tools but did not accept balancing configuration until reboot and unclaims required a reboot to take effect. In all cases, all tools specifically said that no reboot was required. I recommend that you reboot after all claim and unclaim operations.
Step 3: Configure Load Balancing
After enabling the MPIO feature and turning it on for devices, you can configure how MPIO balances IO across the multiple paths.
Method 1: Do Nothing
If you leave it alone, MPIO balances in round-robin fashion. This plan will work fine in nearly every instance.
Method 2: Use Disk Management to Change Individual MPIO Load Balancing
No GUI tool exists to globally modify MPIO load balancing policy. You can change individual LUNs and disks in the disk management MMC tool. Open Disks Management and find the LUN that you want to change (if you came to this article because you had the problem in the title, then notice that all those extra disks have disappeared). Right-click on the volume that you want to update and click Properties.
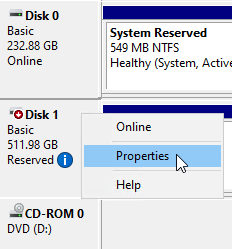
Switch to the MPIO tab. Use the Select the MPIO policy drop-down to select the desired policy for that disk.
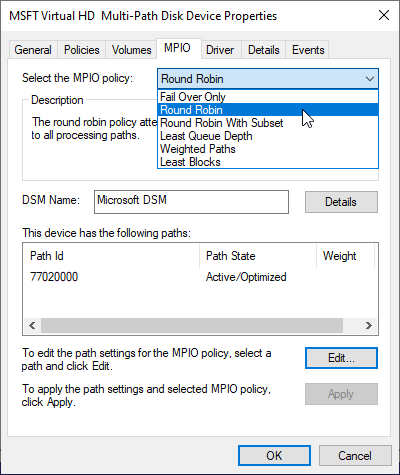
In the above screenshot, notice that it shows only a single path. In this case, it indicates that I need to go check why only one of my two IP address paths have connected. If it looks this way because the device has only one path, then the best thing would be to disable MPIO for this device.
Method 3: Use mpclaim to Set MPIO Load Balancing
mpclaim can set global and individual device policy. As with its claim function, it spells out what it requires for MPIO balancing, albeit somewhat confusingly:
Display/Set LB Policy usage: mpclaim operation apply_to parameters
With the first switch, use -s to show or -l to set. The second switch indicates what you want to work on: -d for a specific device, -m to set the default (will also apply to anything that you haven’t used -d on, and -t works like -m, but with a mask. What you enter for the third parameter depends on what you picked for the other two.
For very granular settings, like configuring the weight for a specific path, I recommend running mpclaim /help and reading the examples. More truthfully, I recommend not getting that deep into it because it almost certainly will not reward your effort.
For more reasonable settings, like setting the default policy to Least Queue Depth, you can use the following:
mpclaim -l -m 4
If you want to set for a particular device, then the easiest way is to first get the device number with:
mpclaim -s -d
That will display something like:
MPIO Disk    System Disk  LB Policy    DSM Name
-------------------------------------------------------------------------------
MPIO Disk0   Disk 1       LQD          Microsoft DSM
The number that you use in mpclaim commands will correspond to the number in the MPIO Disk column. On this system, it only has disk 0. If the output does not give enough information for you to know, then you can use the system disk column with other tools, such as Disk Management or the PowerShell cmdlet Get-Disk to determine which disk MPIO references.
To apply Round Robin with Subset to the above shown disk (which will override the Least Queue Depth policy set by default earlier):
mpclaim -l -d 0 3
To return the device to the system default (LQD in this case):
mpclaim -l -d 0 0
Remember to run mpclaim /help to get a list of the possible load balancing modes.
Method 4: Use PowerShell to Set MPIO Load Balancing
We use other cmdlets in the PowerShell module to control MPIO for viewing and setting MPIO policy. Unlike mpclaim, it only works at the global level (which, again, will handle 99.9% of all scenarios).
For defaults, use Get-MSDSMGlobalDefaultLoadBalancePolicy and Set-MSDSMGlobalDefaultLoadBalancePolicy. Unlike mpclaim, you do not need to know any numbers to use the setting. Tab completion will cycle through the options:
Set-MSDSMGlobalDefaultLoadBalancePolicy -Policy LQD
You do need to understand the meaning of the acronyms, though, so you might want to get a look at mpclaim /help if you can’t figure one out.
MPIO in Practice
Even as a devoted PowerShell evangelist, I recommend using the GUI tools when you only have a handful of systems. It’s easier to remember “mpiocpl.exe” than the vagaries of mpclaim. If bulk scripting or creating an auto-configuration run script, I would use PowerShell to enable MPIO and perform the automatic claim and stop there. I have not yet encountered a good use case for tinkering with policies.