The C++20 standard introduced modules. This feature enhances the language by reducing reliance on header files. Visual Studio 2022’s Visual C++ projects have built-in support for modules. However, they don’t automatically provide access to modularized versions of the standard library headers. This article shows a quick way to configure Visual Studio 2022 to use C++ standard library modules.
[citationic]
Problem Demonstration
To see the specific problem, create a new empty C++ project in Visual Studio. Create a CPP source file and paste in the following code:
import <iostream>;
int main()
{
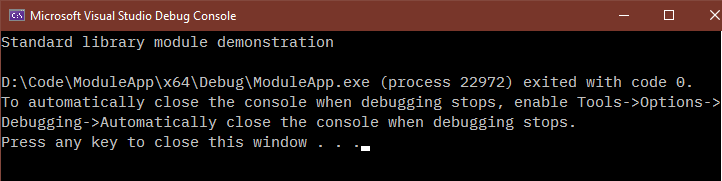
std::cout << "Standard library module demonstration\n";
}
This code fully complies with the C++20 standard, but, as shown by the red squiggles, Visual Studio does not know what to do with most of it:

You have two basic steps to complete: first, you need to configure your project to allow the C++20 standard. Second, you need to allow Visual Studio to use modules in place of standard library headers.
Project Configuration for Visual C++ Standard Library Modules
For better or worse, current iterations of Visual Studio make it very difficult to change Visual C++ defaults. On the “worse” side, you have to repeat the same work for each new project. On the “better” side, when you share your projects via source control, you won’t need to supply a lot of configuration instructions. Anyone who opens your solution file with the accompanying vcxproj.* files will automatically use the same settings. This approach still has problems, of course. This article will not debate the viewpoints; it simply goes with the “better” argument and shows how to configure a project for C++ standard library modules.
To start, open the project’s properties. The project is in the Solution Explorer pane underneath the solution.
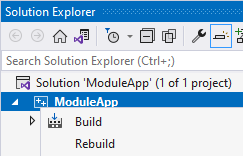
Right-click on the project and click the Properties entry. It’s all the way at the far end of the menu.
You should now see the Properties dialog for your solution. We will use it in the following two subsections.
Part 1: Set the Compiler to Use the C++20 Standard
The dialog box should have opened to the General sub-tab under the Configuration Properties root item. If not, switch to that location.
At this time, Visual Studio 2022 defaults to the C++14 standard. To use C++ modules, you need to switch to at least the C++20 standard. In the C++ Language Standard drop-down, click ISO C++20 Standard (/std:c++20). Alternatively, choose a preview set (or even a later standard if available when you read this).

After selecting a new standard, you can click Apply if you like. Do not close the dialog. If you click OK to return to the code window, the squiggles will disappear. However, if you attempt to compile, you will get a few errors, starting with:
Error C7612 could not find header unit for '...iostream' ...
The next sub-section explains how to fix this.
Part 2: Allow Visual Studio to Supply Standard Library Modules
Still in the project’s properties dialog, switch to the C/C++ section. Alternatively, you can expand the C/C++ section and click on its General sub-tab. In the list, click the drop-down for Scan Sources for Module Dependencies and click Yes.
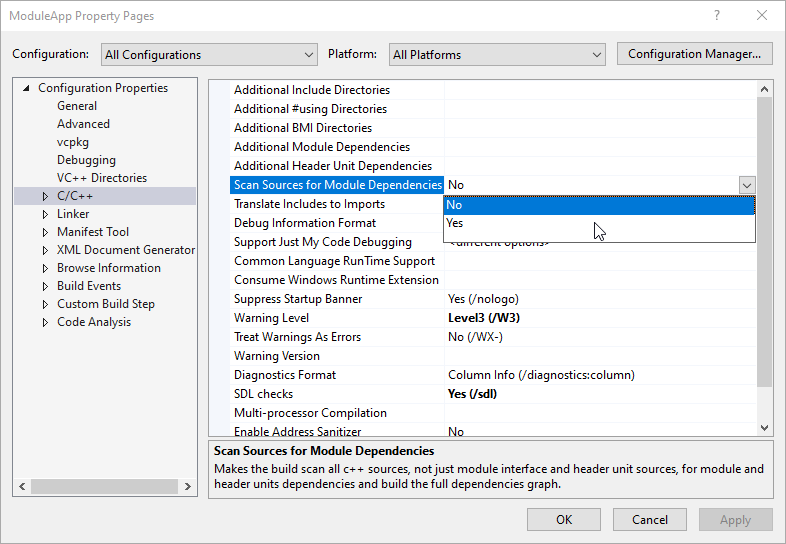
Click OK. A project with imported standard library modules will now compile. From the demonstration code:
Visual Studio can now supply its standard library modules to this project.
Combine Traditional DEFINEs and INCLUDEs in a C++ Module
Adoption of C++ modules has been slow and will probably never replace traditional include and define preprocessor macros in older, larger projects. Even when you have modules available, you will uncover reasons to prefer to include a standard header. For a regular CPP file, like the one with your main routine, you can intersperse includeimport as makes sense.
When you author a module, the rules are different. VC++ will complain about an #include line that appears after a module declaration line and if a module declaration line appears anywhere except the first line. Consider the following example code:
export module MyModule;

#include <algorithm>
import <format>;
import <string>;

export class MyModClass
{

};
Microsoft Visual C++ complains about this with warning C5244: '#include ' in the purview of module 'MyModule' appears erroneous. Consider moving that directive before the module declaration, or replace the textual inclusion with 'import ;'.
If you move the include line above the module declaration, VC++ won’t like that either, although it does give a hint how to fix it: Warning C5201: a module declaration can appear only at the start of a translation unit unless a global module fragment is used.
To use includes in a module file without upsetting your compiler, start your module definition or implementation file like this:
module;
// includes and defines here

module MyModule;
// import lines and import export lines here
A practical example:
module;
#include <algorithm>
#define NOMINMAX
#include <windows.h>

export module MyModule;
import <format>;
import <string>;

export class MyModClass
{

};
You can use this format in module declaration (usually .ixx or .cppm files) and implementation files. Basically, start the file with the line module;, enter includes, then write the rest of the module declaration/definition.
This layout comes in handy in those places where a module could work but the compiler generates warnings that you can’t correct and your environment does not tolerate compiler warnings.
Additional Notes
Modules don’t have nearly the same length of vetting and debugging history as header files. Expect some hiccups. As an example, when compiled with Visual Studio C++ 17.5, the demonstration program generates the following warning:
warning C5260: the constant variable 'std::memory_order const (* `std::memory_order __cdecl std::_Combine_cas_memory_orders(std::memory_order,std::memory_order)'::`2'::_Combined_memory_orders)[6]' has internal linkage in an included header file context, but external linkage in imported header unit context; consider declaring it 'inline' as well if it will be shared across translation units, or 'static' to express intent to use it local to this translation unit
You cannot do anything about this in the short term other than revert to using header files. Future updates to the compiler and toolset will include fixes as users find them and Microsoft corrects them.