Most administrators don’t spend a significant portion of their careers installing operating systems (a good thing!). The activity sits at the foundation of our profession, however. From painful lessons learned from Windows installations in the 1990s, modern Microsoft operating system installers follow a minimalist philosophy. The process focuses on aspects that you cannot change later without a complete reinstall. Even basic things, like naming the computer, must wait until installation completes. This article walks through an install of Windows Server 2025.
Articles like this have looked almost identical for over a decade. The last major change to the Windows Server installer was in the 2012 release. Through 2022, almost nothing changed. The installer for Windows Server 2025 brings enough changes to justify a more thorough write-up. Fortunately, the new items won’t cause much confusion.
How to Acquire Windows Server 2025
You can get Windows Server 2025 from:
- Microsoft’s Windows Server 2025 Evaluation Page
- The Microsoft licensing site, using the login assigned to you or your organization
- An OEM (original equipment manufacturer, such as Dell or Lenovo)
- A retailer
All sources usually provide the same installation experience. An OEM can add text or even screens. This article uses the evaluation ISO for its examples.
Choose Windows Server 2025 Installation Media
You have two choices for Windows Server installation media: digital DVD image file or physical DVD. Physical media may ship as an OEM-branded disc with new server hardware. Some retailers offer physical disc purchases. However, you will probably get your Windows Server bits from a digital source.
If you choose digital distribution, you may also have a choice there. Most sources provide an ISO (digital representation of a DVD). The evaluation site also gives you the option to download Windows Server as a virtual hard disk file (VHDX format). You can connect that directly to a Hyper-V virtual machine and set it as the boot device. When you turn the virtual machine on, Windows Server starts from the OOB (out-of-box) point immediately after installation. You can rename the VHDX file before using it to match your virtual machine. If you want to use an alternative hypervisor that cannot process the VHDX format, check that vendor’s support resources to learn if you can convert the VHDX file to a bootable drive in their format.
If you purchase Windows Server licenses and only receive a key but no media or instructions on accessing it, download an evaluation copy. You can use most key types to turn an evaluation copy into an activated license.
Convert Windows 2025 ISO to Physical Media
Windows has features that allow you to create bootable media from ISO without additional software. Right-click on the file. Windows 11 and Windows Server 2025 will show their new context menu, which does not contain the desired menu item. Click Show more options. That will bring up the traditional file context menu, where Windows 10 and versions of Windows Server prior to 2025 start. On that menu, click Burn disc image. The following image contains screenshots of both menus.
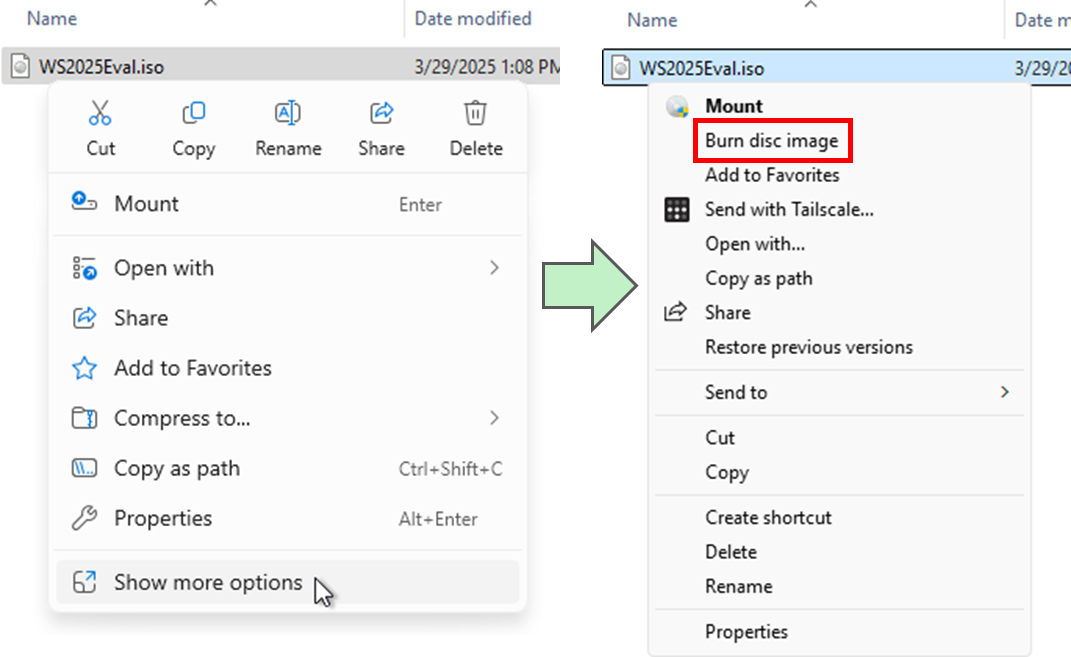
Clicking Burn disc image displays a small dialog that allows you to select your hardware disc writer and start the process.
You can use PowerShell to make a USB device bootable with the Windows Server 2025 install ISO. Microsoft provides instructions. You can choose from several third party tools such as Rufus and Balena Etcher. Rufus adds the ability to use your USB drive not simply as bootable install media, but to expand Windows Server into it so that the drive becomes your Windows Server system disk. Most manufacturers do not build their USB drives with the intent of continuously hosting a running operating system, so use caution.
Choose a Windows Server 2025 Edition
Windows Server ships in three primary editions: Standard, Datacenter, and Azure. The editions only have a few differences, mainly around intended purpose.
- Standard Edition: Unless you have a definite reason otherwise, use Standard Edition. It has all features needed to host application servers and most infrastructure services.
- Datacenter Edition: Datacenter Edition adds features mainly used for large scale virtualization. It almost never makes sense to install Datacenter Edition inside a virtual machine. It adds these features:
- Storage Spaces Direct: Commonly shortened to “S2D”, this feature allows you to cluster multiple hosts for distributed storage. You could use this a platform for the “scale out file server” role, in which a single logical file server can stay online with at least one offline node. More commonly, organizations couple it with Hyper-V to provide hyper-converged infrastructure.
- Automatic Virtual Machine Activation: The Windows Server Datacenter license includes unlimited “virtualization rights”. On a single fully licensed host, you can run as many instances of Windows Server as it can physically handle without purchasing additional licenses. To make activation of those instances simpler, Datacenter Edition has the Automatic Virtual Machine Activation, which handles activation for Windows Server guests in Hyper-V. You can read more about this feature, including how to use it, on Microsoft Learn.
- Host Guardian and Network Controller: These two features bring security and network management features best used at scale.
- Azure Edition: As you might expect, Azure Edition ties into your Azure subscription. It’s only supported running inside a virtual machine. It receives feature updates ahead of the other two editions and allows you to extend your Azure network on-premises.
Windows Server Standard Edition carries the lowest price tag for perpetual Windows Server licenses. If an instance of Windows Server will only run a traditional software server, such as for line of business applications, Active Directory domain services, and the like, then you probably have no reason to use anything else.
Choose a Windows Server 2025 Install Mode
You can install Windows Server with or without its full graphical user interface. By default, Windows Server wants to install in non-graphical mode, typically called “Windows Server Core”. This mode, frequently used in so-called “headless” deployments where the system has no permanently attached monitor, keyboard, or mouse, adds a bit of security by removing the rendering engine behind Explorer or the extensions in Windows Presentation Foundation (WPF). Also, without a full GUI, a logged on session consumes fewer resources. The older WinForms technology still works, so you can run simpler graphical applications like MSI programs.
If an application requires the full GUI, or simply you prefer it, make sure to choose a “Desktop Experience” mode during Windows Server installation.
Pay-As-You-Go Licensing For Windows Server 2025
Licensing Windows Server was already an enormous topic. To keep this article on track, we won’t go deeply into it. However, Windows Server 2025 introduced a new licensing method called “pay-as-you-go”. You connect your installation to your Azure subscription using Azure Arc. Then, instead of the single up-front payment for perpetual licensing and ensuring that you have sufficient client access licenses (CALs), you pay for the Windows Server instance according to usage. Pay-as-you-go installations do not require normal Windows Server CALs (although they do require RDS CALs if they host RDS services). The exact price that you pay depends on your Azure subscription rates.
In most cases, traditional perpetual licensing makes more fiscal sense than pay-as-you-go. However, you owe nothing until the system has been online for seven days, which makes pay-as-you-go attractive for extremely short-lived systems. For instances that will have a longer lifespan, you’ll need to calculate the cost differences between perpetual and pay-as-you-go based on your pricing.
For all licensing, consult with your reseller. This is a legal conversation more than a technical one, so mistakes expose your organization to costly fines and lawsuits. Authorized Microsoft license resellers should have credentialed staff to help you determine what you need to buy. For smaller organizations, remember that Windows Server Standard Edition grants you the right to run two virtualized instances of Windows Server on the same host, and you can stack those licenses if you only need a few instances (probably no more than 6 or 7 before Windows Server Datacenter Edition becomes economical). Project Runspace has an article that explores the two virtualization rights provided by Standard Edition.
A Walkthrough of Windows Server 2025 Installation
This section takes the installation in chunks. First, we show installation by booting from media. Second, we show an in-place upgrade. Third, we show what it looks like when you start from the VHD distribution. The section afterward walks through a few post-install activities.
Install Method 1: Boot from Media
The complete install method starts by booting a computer from installation media. After loading files and initializing, the Windows Server 2025 installer starts with the localization screen. Choose your language and currency format, then click Next.

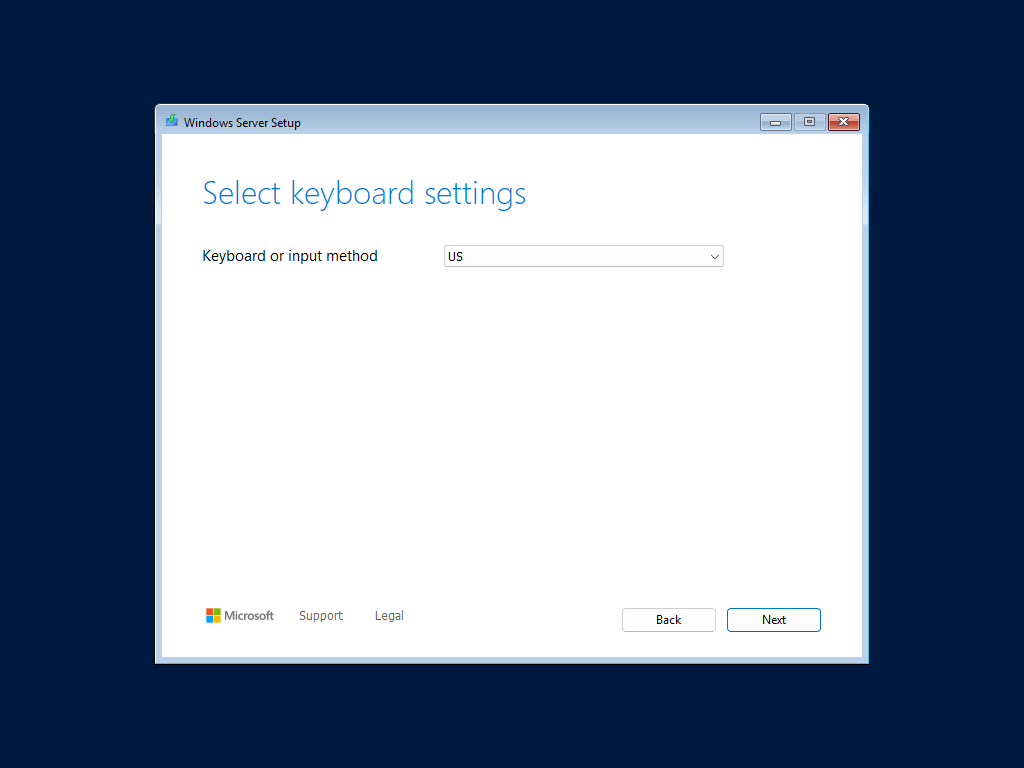
Choose the default layout for keyboards connected to the system and click Next.
Choose the action that you want to take. The first, “Install Windows Server”, runs the installation program. This walk-through follows that path. With that item selected, check the box to acknowledge that “I agree everything will be deleted including files, apps, and settings” and click Next.
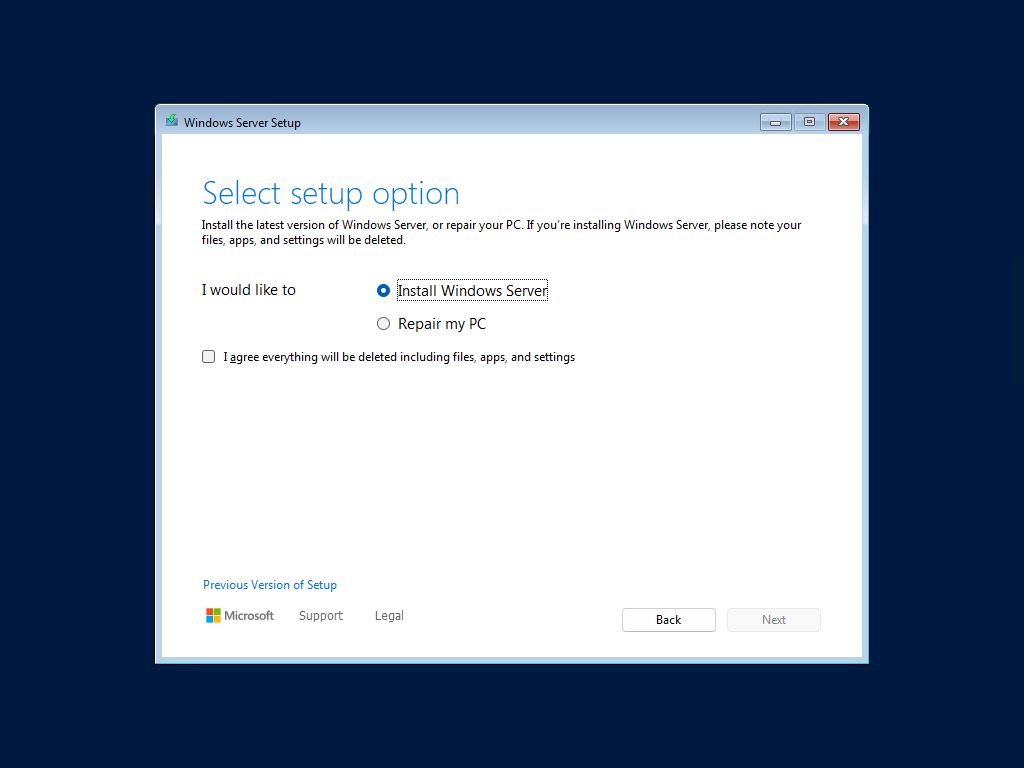
Note 1: The “Repair my PC” option takes you to the recovery menu and does not force you to delete anything, so the checkbox disappears if you select that radio item. However, you cannot perform a Windows Server installation using this route.
Note 2: Notice the link for “Previous Version of Setup” in the lower left. Clicking that takes you to a setup process that looks like it did in Windows Server 2022 (which looks essentially like every Windows Server installer back to 2012). You can read our article on installing Windows Server 2022 for a walk-through of that view.
Select the edition and operating mode and click Next. The available options differ based on the media that you used. This screenshot was taken from evaluation media, which includes only the Standard and Datacenter installation options.
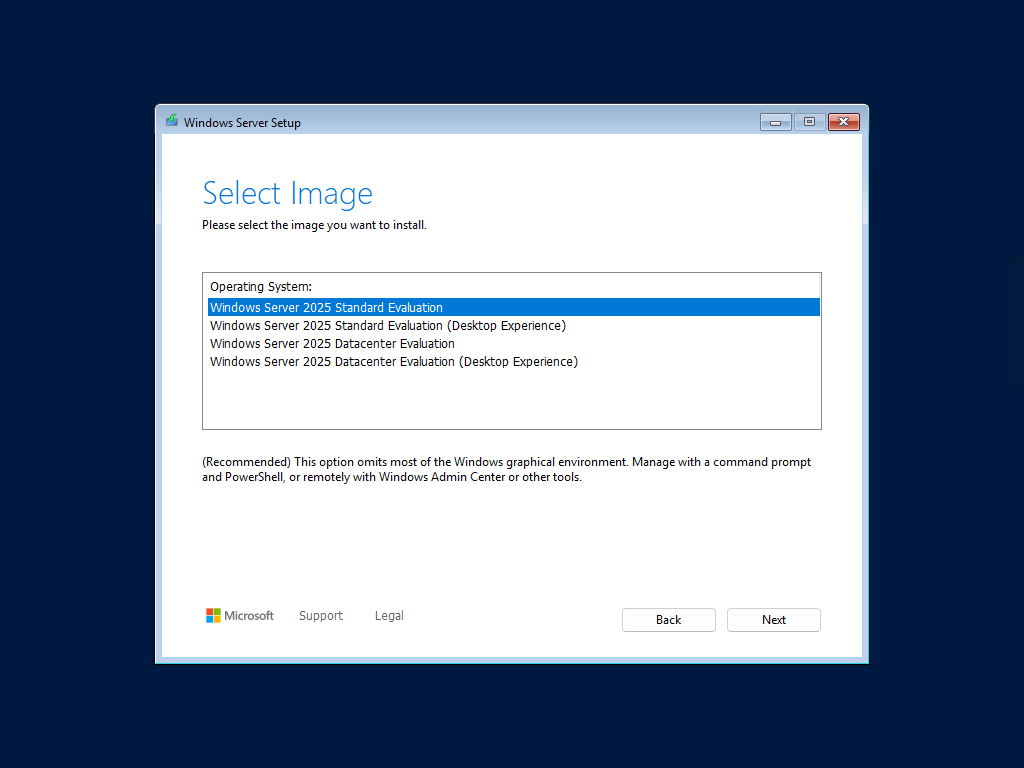
Note: You can use different product keys to switch between editions, but you cannot add or remove the desktop experience without reinstalling Windows Server.
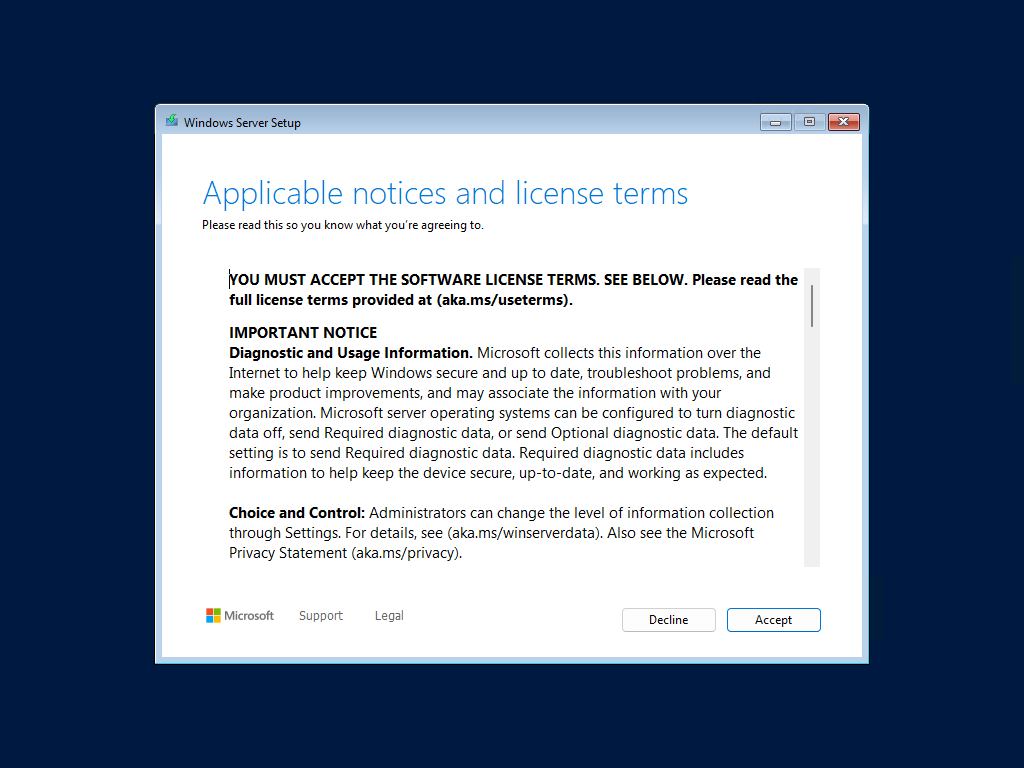
Read through the license agreement and click Accept when ready.
Select the disk and partition to hold Windows Server. This dialog page has changed in appearance from previous versions, but it has the same functionality. When you click Next, two things happen. First, the installer creates any necessary partitions and places a boot loader on the partition that receives control from the system’s BIOS or UEFI. It does that as soon as you click Next! Second, the installer prepares to create the new Windows Server installation in the highlighted partition or unallocated space. If you selected an object it can’t use, it will prevent you from clicking Next.
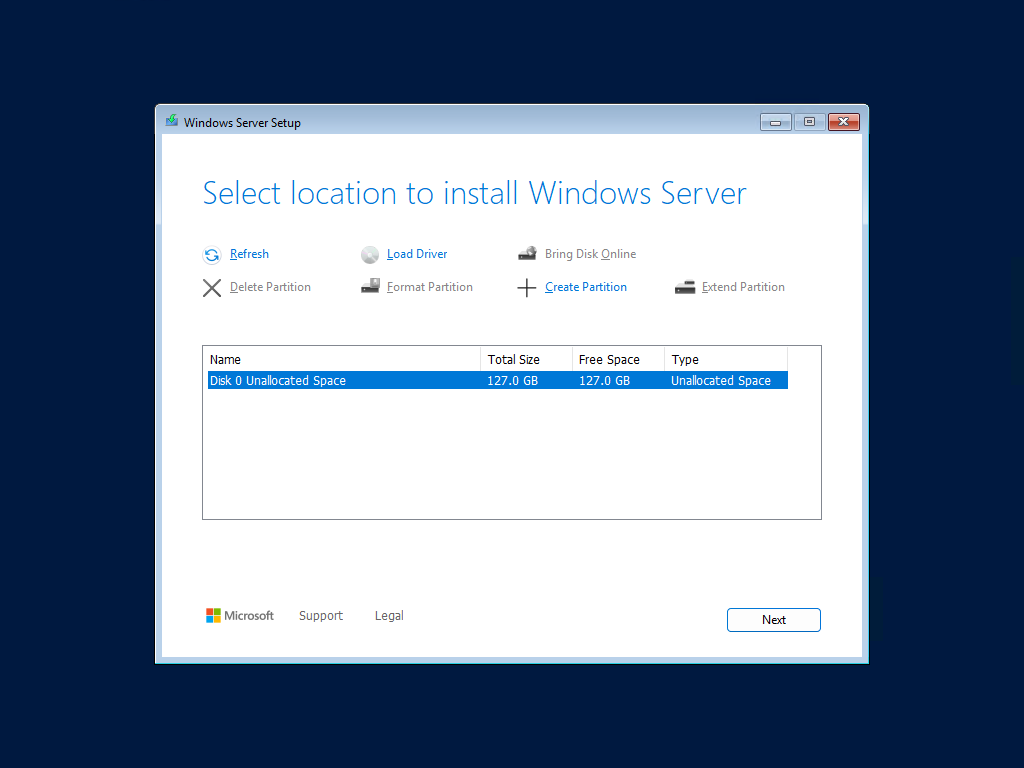
Note: If the disk that you want to use does not appear, you likely need to load a driver. The manufacturer of the disk or disk system should have one in their packaging or available for download. Specifically look for a driver intended for Windows installation. You will need to place it on media that you can connect to the system, such as a USB device or an optical disk. Use the Refresh and Load Driver buttons as you change media and load drivers so that the installer can rescan the system.
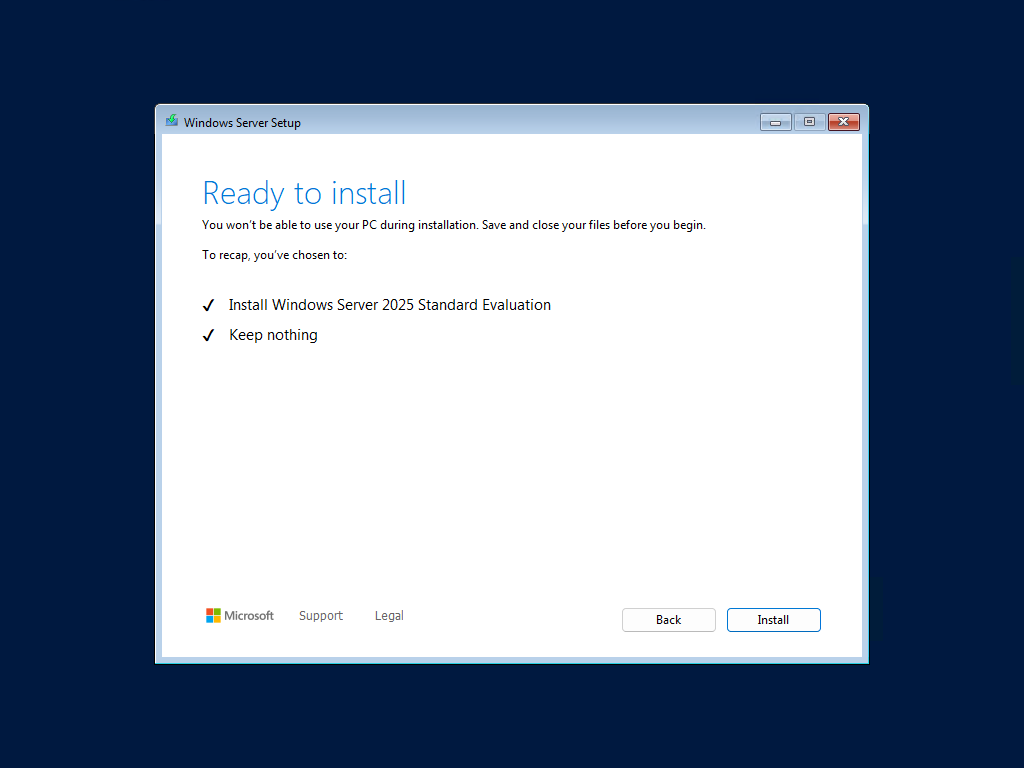
The installer gives you a final chance to review your edition and mode selection. Remember that it specifically says “(Desktop Experience)” when installing the GUI, so if you want that and don’t see it, you will need to cancel and start over. Otherwise, click Install.
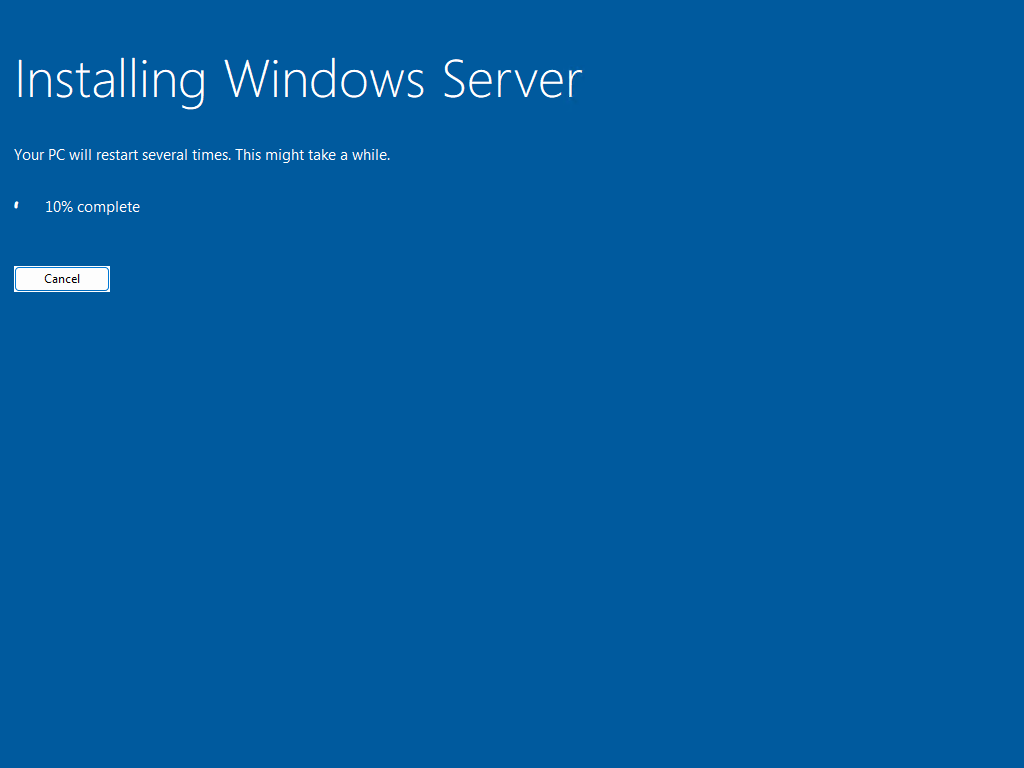
The installation will begin, and as it indicates, may reboot more than once.
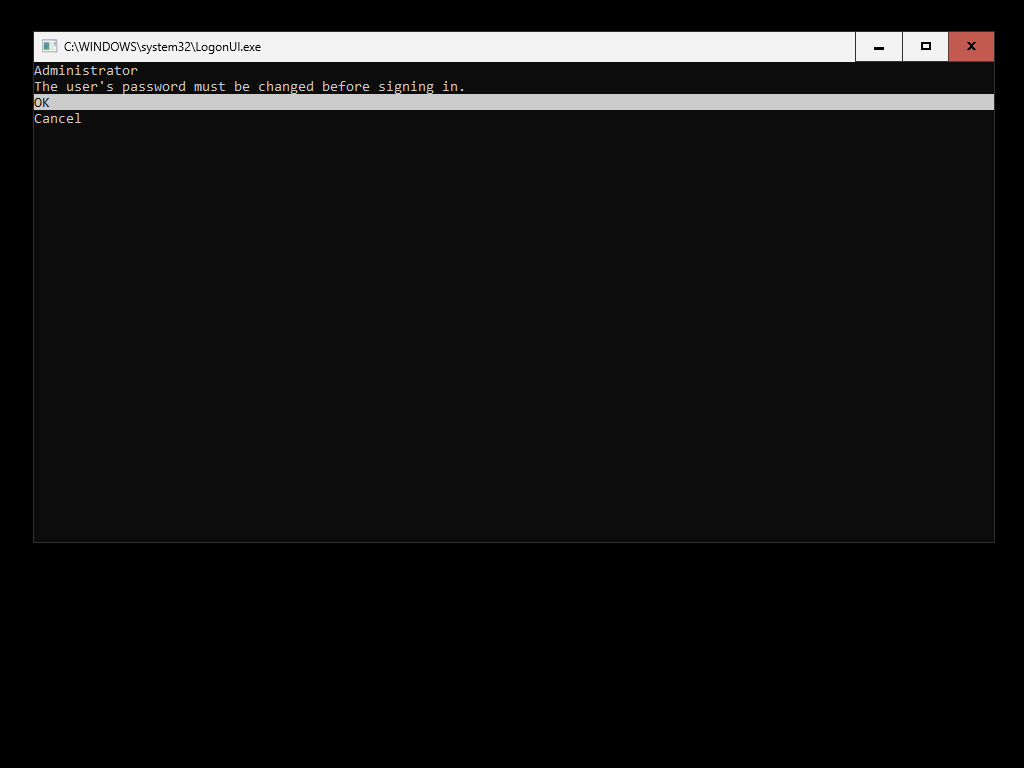
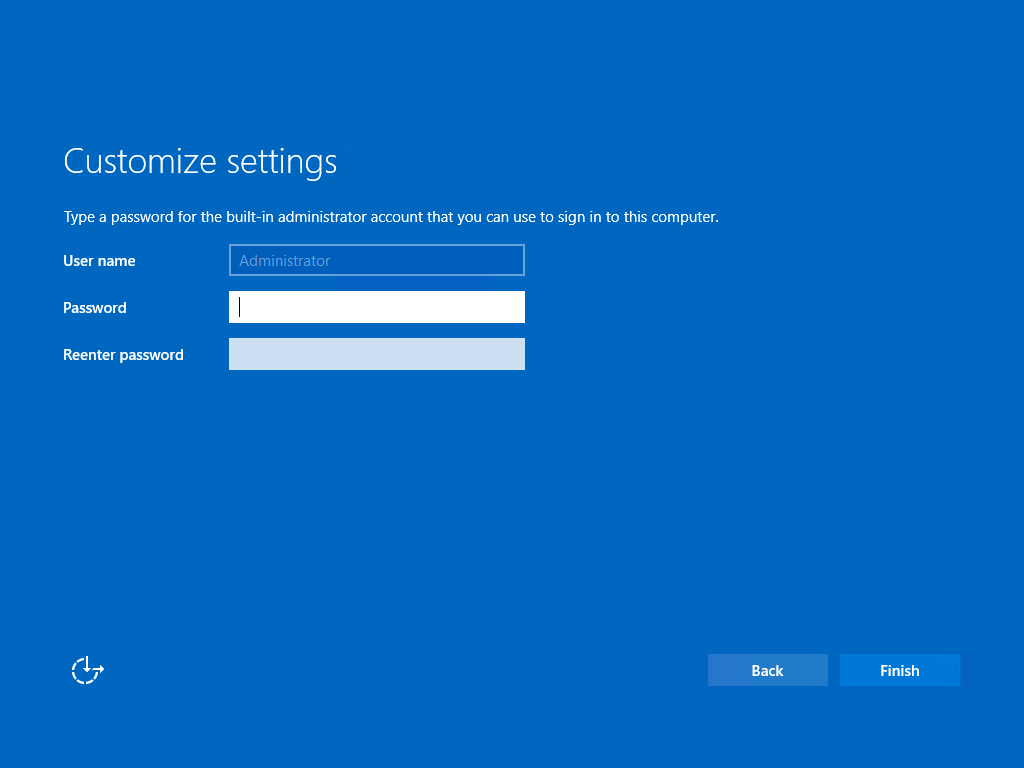
When installation completes, it will prompt you to change the password for the built-in administrator account. Follow the prompts to do that. The screenshot was taken from a Core installation. A desktop experience will have the same workflow but look different.
Congratulations! You have successfully installed Windows Server 2025. You will see a few more screens about optional configuration, such as sending telemetry data. After finishing that, you will see the main Windows Server 2025 screen with either “sconfig” (for non-GUI) or Server Manager (for desktop experience). Jump to the post-installation section of this article for basic Windows Server configuration instructions.
Install Method 2: In-Place Upgrade
During an in-place upgrade, you install Windows Server directly over the top of an existing Windows Server installation without formatting or otherwise cleaning the storage. Windows Server 2025 exceeds its predecessors in upgrade paths, allowing up to an “N-4” upgrade. This means that you can directly upgrade to Windows Server 2025 from any of the previous four versions of Windows Server. It will upgrade Windows Server 2012 R2 straight to 2025 without requiring you to first upgrade to an interim version.
You can also use this method with the same version of install media as already installed. We use this to fix problems in Windows Server when we run out of easier fixes. We typically refer to that as a “repair install”.
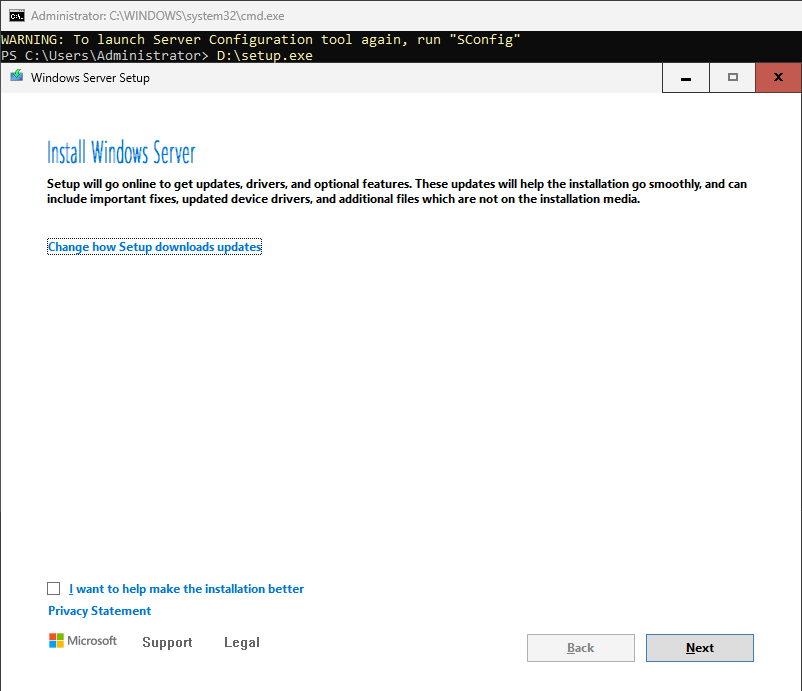
Start an in-place upgrade by mounting the installation media or extracting its contents to a local disk. From there, run setup.exe. The following screenshot shows how the first screen on the upgrade installer looks when run from a command prompt.
Note: The minor distortion of the screenshots in this section result from running the install wizard from Windows Server core instead of the desktop experience.
If you click the Change how Setup downloads updates link, you can change from the default option that downloads updates to skip that and only use the setup files from the installation media. You can also check the I want to help make the installation better checkbox to send installation telemetry back to Microsoft.
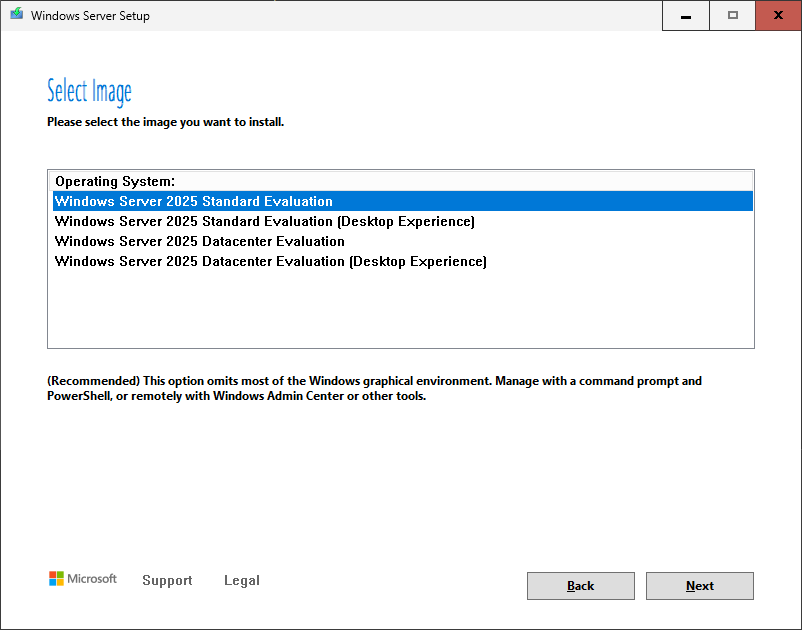
When you click Next on the first screen, the wizard asks which edition and mode of Window Server you want to install. The available options differ based on the media that you used. This screenshot was taken from evaluation media, which includes only the Standard and Datacenter installation options. Make your selection and click Next.
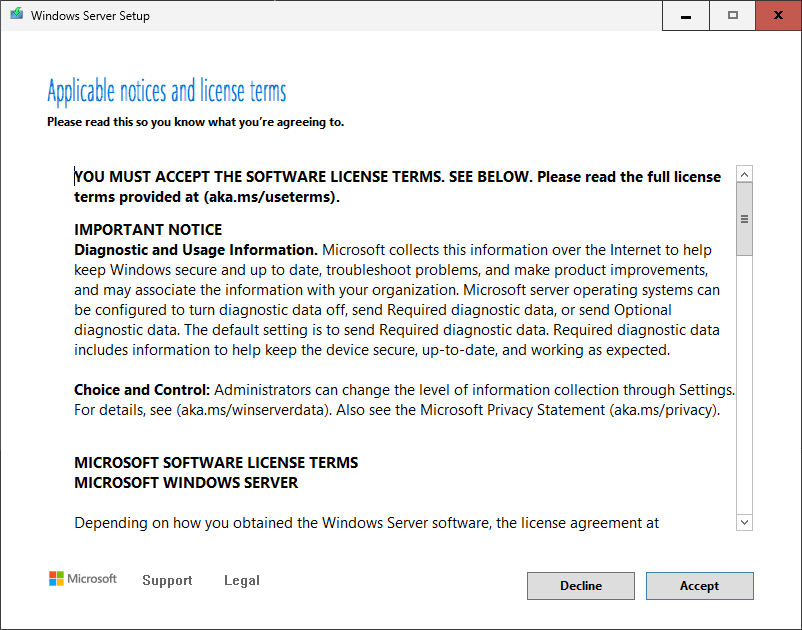
Review the license terms. When ready, click Accept.
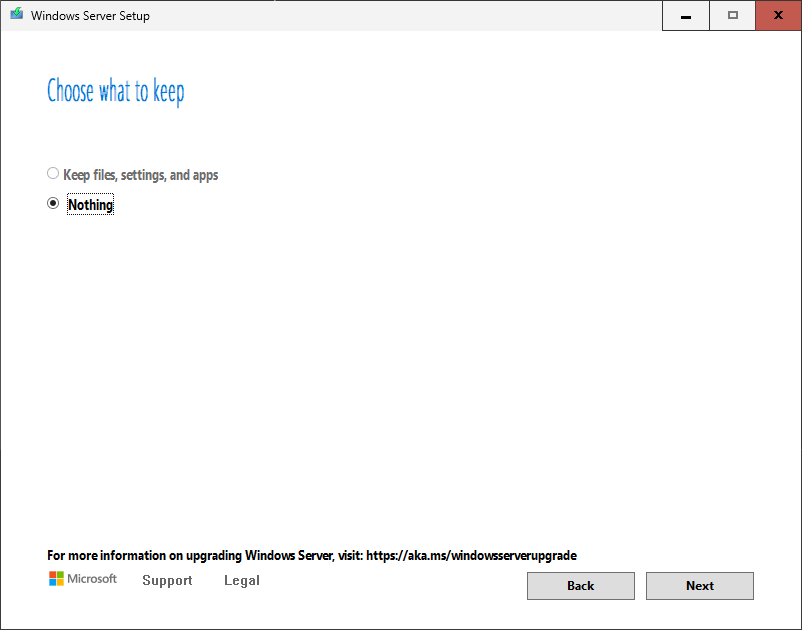
Next you will need to decide if you want to keep your files and settings or wipe the system and start over. From evaluation media, you cannot choose anything except Nothing. Select what you want to do with the existing data and click Next.
Unless you prevented the installer from downloading updates, it will download any available.

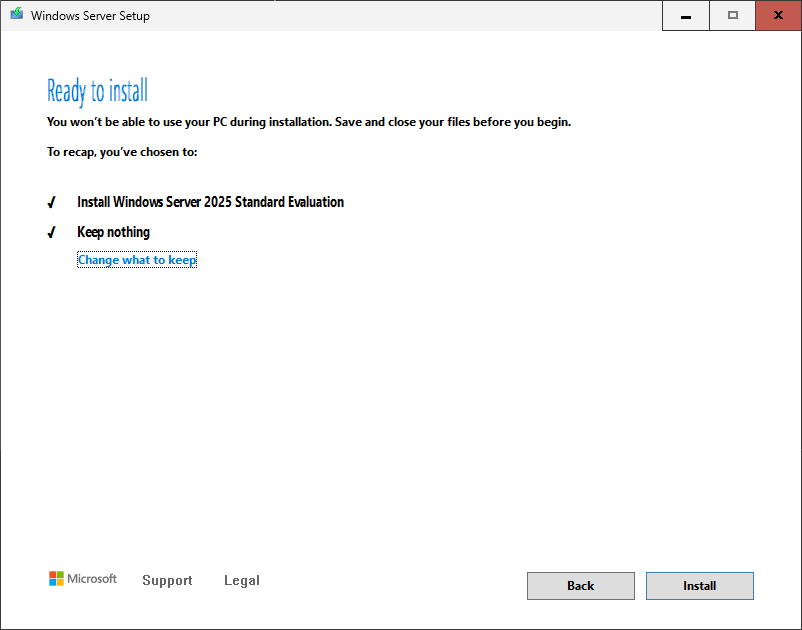
The last interactive screen allows you to review what you’ve picked and go back or proceed. Use the Install button if you’re ready to continue.
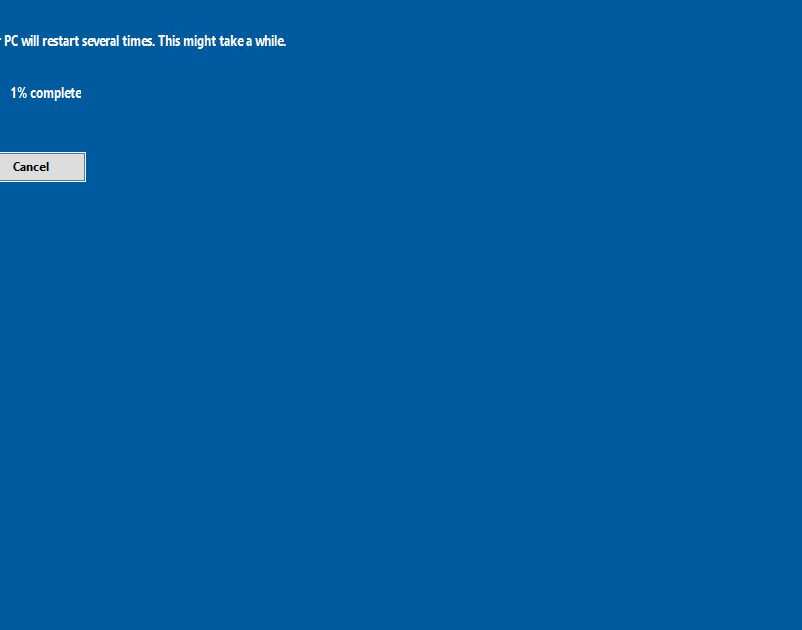
From this point, the installer looks no different than it would if you installed new instead of upgraded. The system will run through its process, rebooting as necessary.
If you chose to remove everything, then the installer will end up at the out-of-box experience (OOBE). If you kept your existing settings, it will still have some OOBE steps, but your next login will take you to the upgraded system instead of an empty one.
Install Method 3: VHD Distribution
This path has no true installation, as the VHDX has an installed copy of Windows Server. It has a couple of catch-up items that you missed by not going through the installation wizard. This section walks through the items that you see when using that VHDX.
You must first attach the VHDX to a virtual machine in Hyper-V or another hypervisor that can boot virtual machines from a VHDX. We recommend that you make a copy of the downloaded VHDX and rename the copy to something appropriate for the virtual machine before you attach it. When ready, boot the virtual machine and connect to its console.
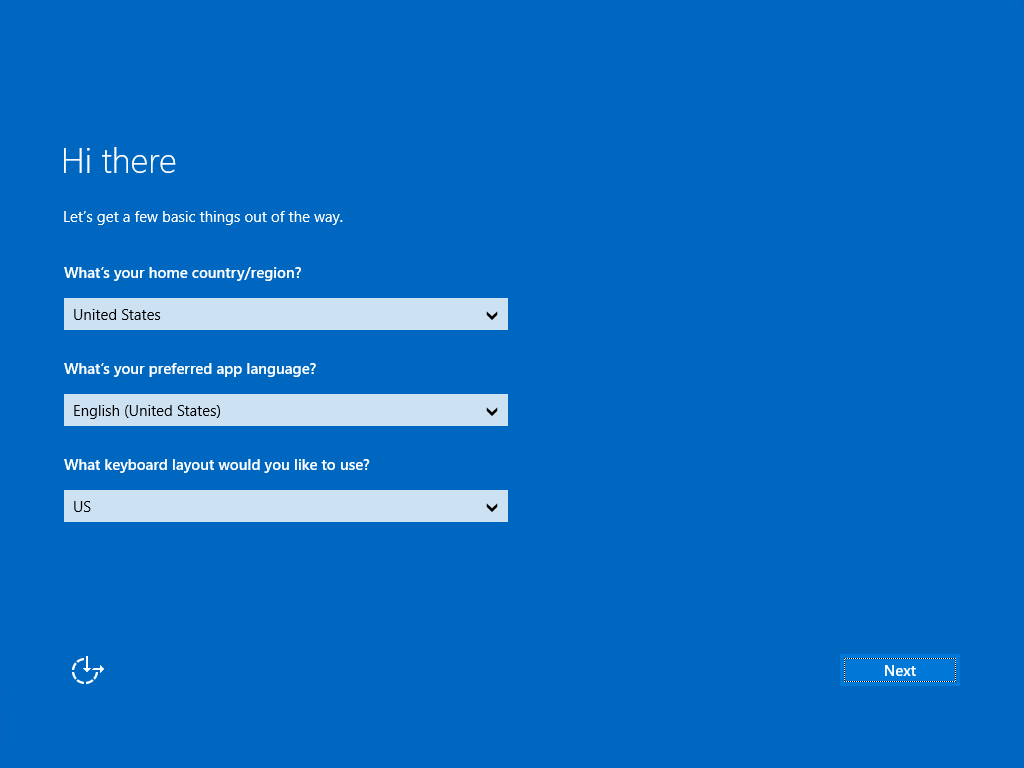
The first screen asks you for your region, language, and keyboard layout. Choose the appropriate items and click Next.
Review the license agreement and click Accept when ready.

Now the VHDX distribution joins at the same point as the traditional installer after boot by asking you to change the local administrator’s password. Provide the new password and click Finish.
This completes the “install” portion and leaves you with a fresh Windows Server instance.
Windows Server 2025 Post-Installation Steps
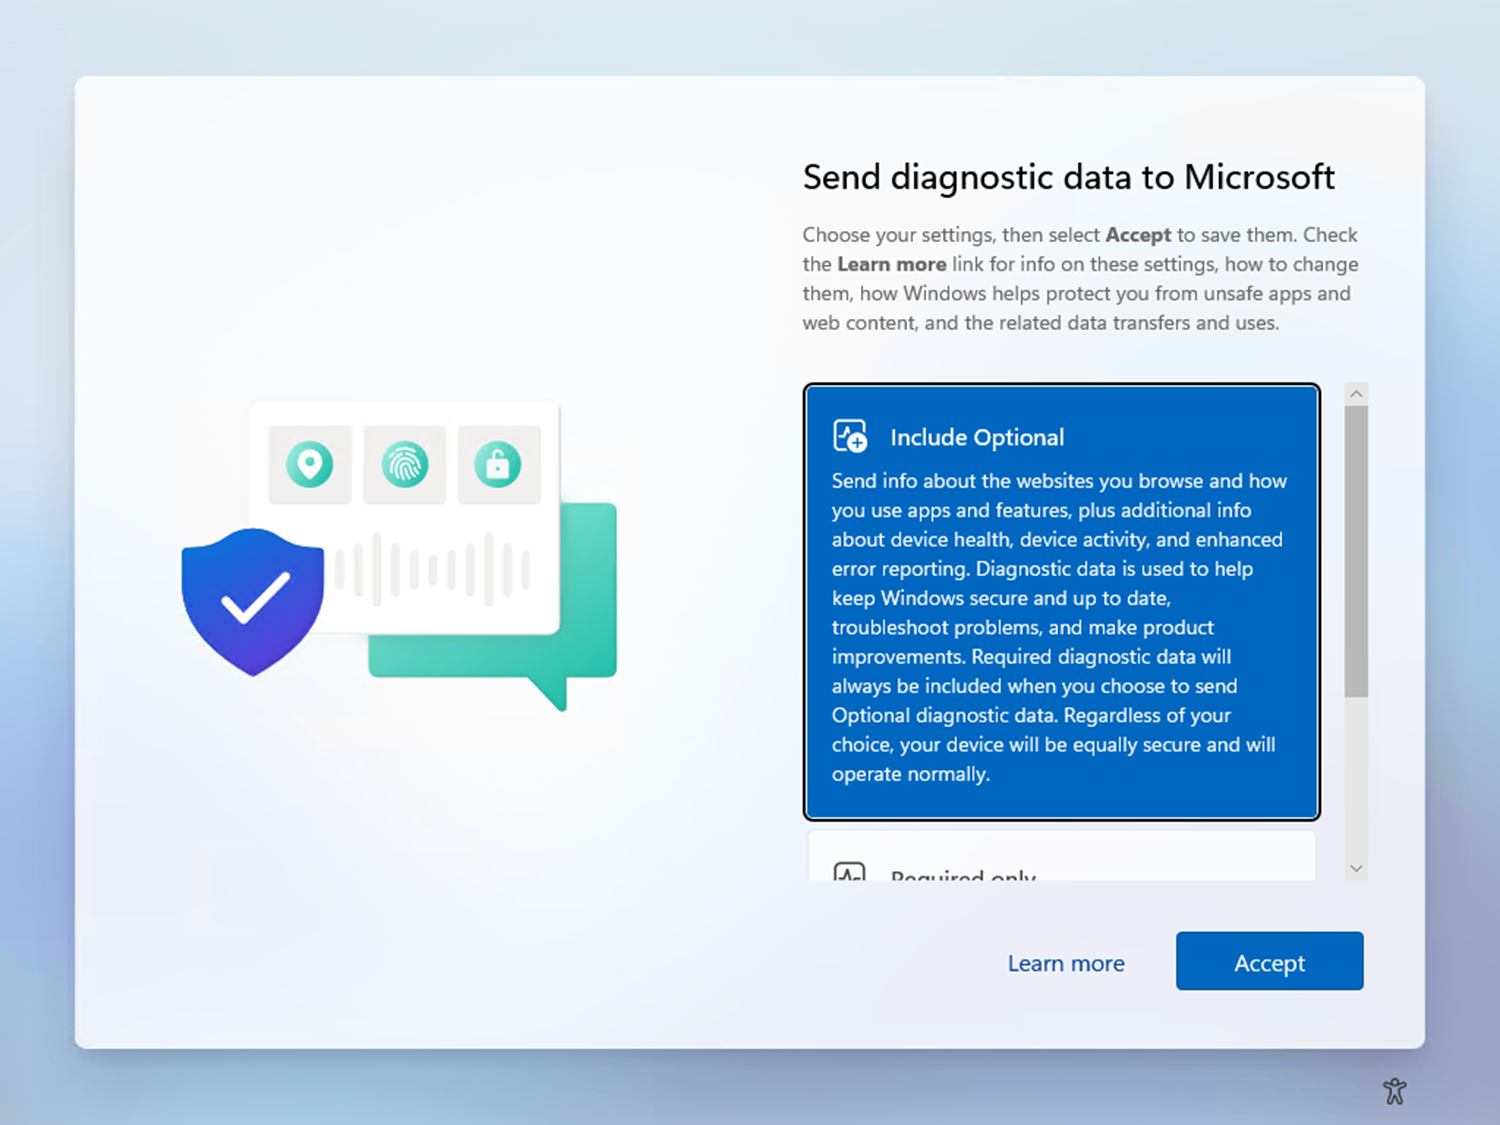
First, you need to choose a telemetry setting, whether only required data or to include optional data as well.
After you answer the telemetry question, Windows Server shows you your primary shell. For the desktop experience, you see the normal Windows desktop and Server Manager. For Windows Server Core, you see the character mode configurator. Even in the desktop experience, you can start that tool by opening an elevated command prompt and running sconfig.cmd.
Because sconfig exists on all editions and modes of Windows Server, we use it for the rest of these steps.
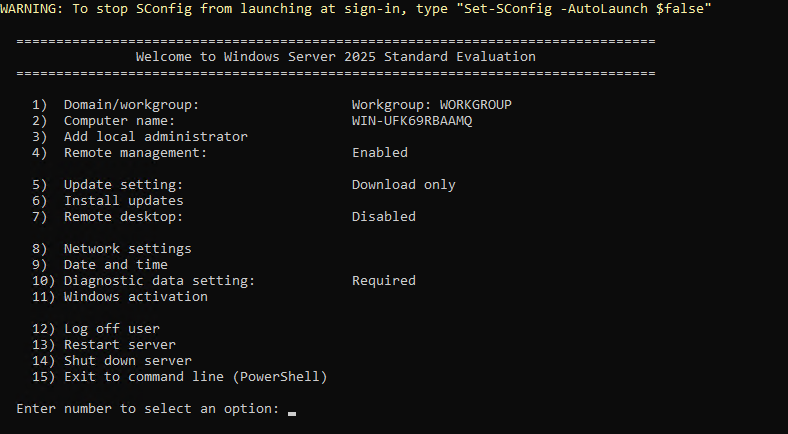
Set the Server’s Computer Name
Start by assigning the server a proper name. Follow your organization’s naming conventions, if any. Otherwise, name it in a way that helps explain its purpose. On the sconfig main menu, type 2 and press Enter. to go to the Computer name screen. Enter a new name and press Enter.
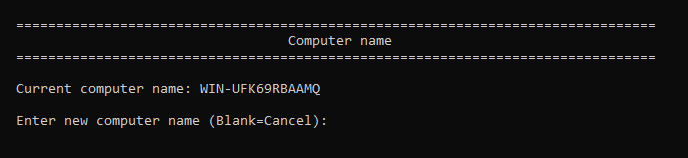
The interface will ask you to reboot after providing a new name. You can reboot now or continue configuring and reboot later.
Configure Networking
A new Windows Server acts as a DHCP client. You don’t need to do anything else in this section if you want to continue using DHCP. To assign a static IP from the sconfig main menu, press 8 and Enter to switch to the networking menu. It will show all detected physical adapters.
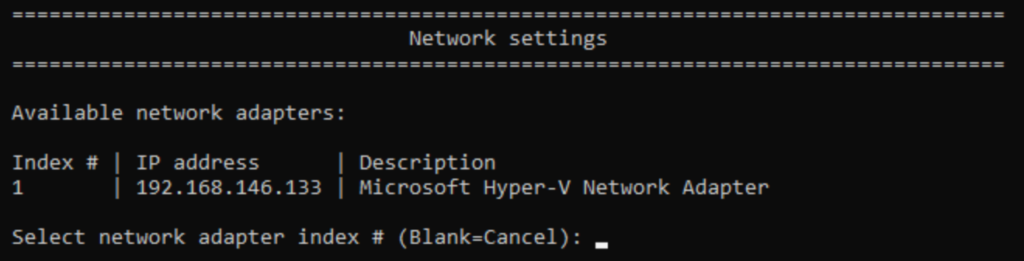
Windows Server assigns an index to each adapter. Type the index number of the adapter that you want to configure and press Enter. sconfig will show you the adapter’s current IP setting and allow you to change it.
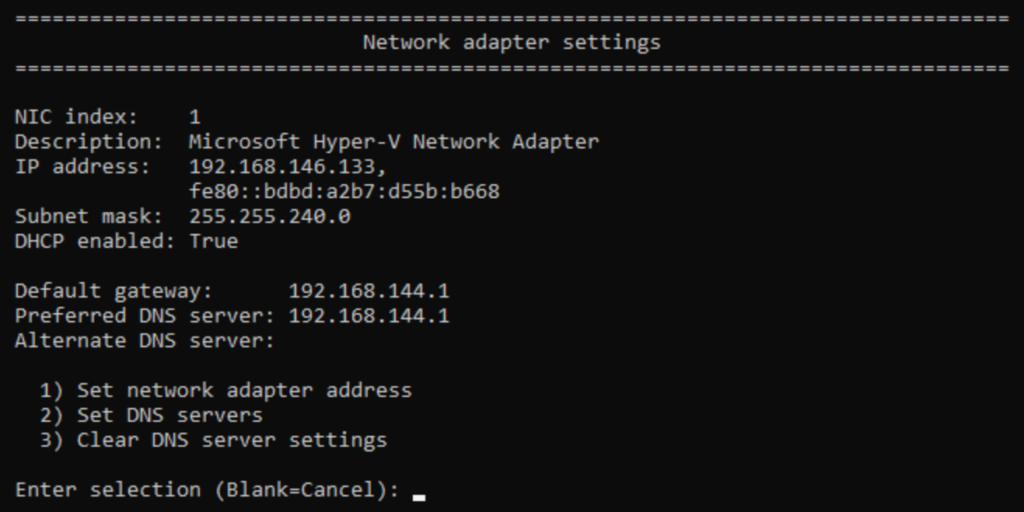
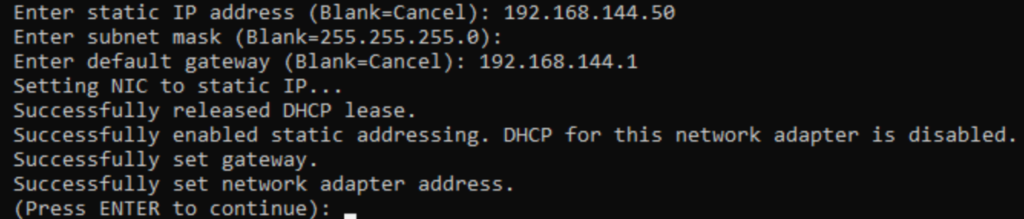
To change the IP address, type 1 and press Enter. sconfig will first ask if you want to set DHCP (which you can use to restore DHCP if it has a static IP). For these instructions, type S and press Enter to set a static address.

Follow the prompts to set the IP, subnet mask, and gateway. If you need to apply an IP address but no gateway, then enter 0.0.0.0 or the adapter’s own IP address when asked for a gateway. If you enter nothing, it will cancel IP assignment and sconfig might place the adapter in an uncertain state that it can’t correct.
Upon pressing Enter, sconfig returns to the main. You still need to set DNS servers, so enter 8 and the number of the adapter’s index again. This time, press 2 to set DNS servers. You can enter a preferred and alternative DNS server. If you simply press Enter at either point, sconfig stops assigning DNS servers there.

Once you press Enter, sconfig returns to its main menu.
Join the Server to a Domain
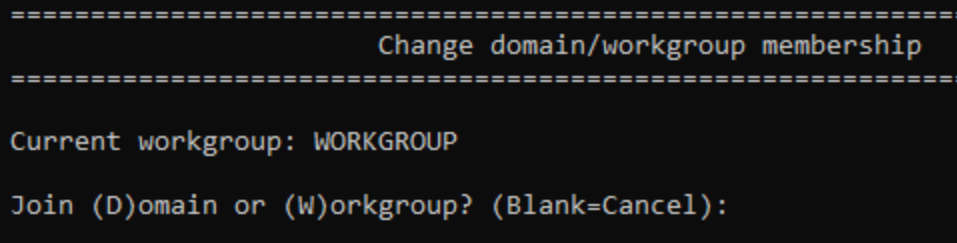
Once the server can communicate on the network, it can join an Active Directory domain. From the sconfig main menu, type 1 and press Enter. sconfig will show you the Domain/Workgroup screen. To join a domain, type D and press Enter.
Type the domain name and press Enter.

Provide the name of a domain account with privileges to add computers and press Enter.

You will need to provide a password for that account. Upon pressing Enter, sconfig will attempt to connect to the indicated domain with the specified credentials and show you its results. Reboot as prompted or return to the main menu.
Other Post-Install Activities
Your server now belongs to your network and, if you chose, your domain. Any automated routines that you have in place can take over from here.
However, if you have no such systems, then you can continue using sconfig to complete setup. You can:
- Install updates (with or without enabling automatic updates)
- Enable automatic updating
- Set the time, including the time zone
- Provide a license key and activate
- Enable access via remote desktop
In most cases, the order that you do these things does not matter. However, if you intend to make the server a permanent domain controller, then you need to enter the license key before promoting it. You cannot change the key afterward.
Start Exploring Windows Server 2025
You have completed Windows Server 2025 installation. If this is a new journey for you, one place you start is with the “What’s New in Windows Server 2025” page. It contains links to many items you can use for orientation.